Oct . 21, 2024 14:26 Back to list
laying out roof shingles
Laying Out Roof Shingles A Comprehensive Guide
When it comes to roofing, laying out shingles correctly is crucial for both aesthetic appeal and protection against the elements. Properly installed shingles can enhance the longevity of your roof, ensuring that your home remains safe and secure. Here’s a detailed guide on how to effectively lay out roof shingles.
Step 1 Gather Your Materials
Before you start, you’ll need to gather all necessary materials and tools. This includes shingles, roofing felt, a chalk line, a utility knife, a hammer, roofing nails, and a ladder. Make sure all materials are of high quality to ensure durability and effectiveness.
Step 2 Prepare the Roof Deck
The roof deck should be clean, dry, and free of debris. Inspect for any damage and make necessary repairs. If you're working with a new roof, you may want to install roofing felt to provide an additional barrier against moisture. Lay the felt horizontally across the roof, overlapping each row by at least 2 inches.
Step 3 Mark Reference Lines
To ensure a straight layout, use a chalk line to mark where the first course of shingles will go. Start from the eave and work your way up toward the ridge. The first row must be installed properly since it sets the standard for the rest of the shingles. Make sure that your chalk line is level, and adjust as needed.
laying out roof shingles

Step 4 Install the First Course of Shingles
Begin with the first course of shingles, laying them along your marked line. Most shingles come with pre-cut tabs which will make aligning them easier. Use roofing nails to secure each shingle, ensuring they are placed under the tar strip for proper adhesion. It’s important to nail down each shingle in four points—two on each side—to prevent wind lift.
Step 5 Stagger the Joints
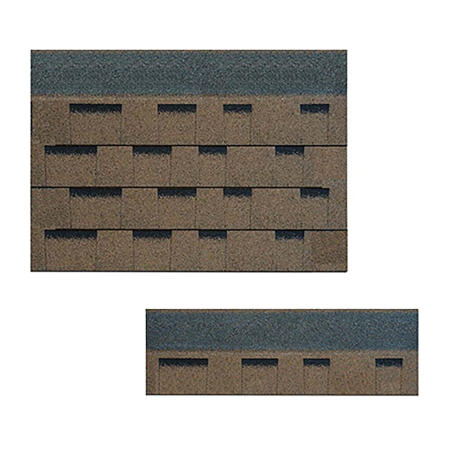
As you continue installing shingles, make sure to stagger the joints. This not only enhances the visual appeal but also offers better protection against leaks. A common practice is to offset each row by half a shingle. This helps distribute water runoff effectively and prevents it from slipping beneath the shingles.
Step 6 Work Up to the Ridge
Continue laying shingles up the roof, ensuring that each course is level and aligned. As you approach the ridge, you may need to trim shingles to fit properly. Use a utility knife for a clean cut, and ensure the final shingles align snugly with the ridge cap.
Conclusion
Laying out roof shingles may seem daunting at first, but with proper preparation and attention to detail, it can be a highly rewarding DIY project. Follow this guide meticulously, and you will have a beautifully finished roof that not only protects your home but also adds to its overall appeal. Always remember to adhere to local building codes and safety regulations while working on your roofing project.
-
Rubber Roofing Shingles - Durable & Weatherproof SBS Rubber Asphalt Shingles for Homes & Businesses
NewsJul.08,2025
-
Crest Double Roman Roof Tiles – Durable, Stylish Roofing Solution at Competitive Prices
NewsJul.08,2025
-
T Lock Asphalt Shingles Durable Roofing Solution for Long-lasting Protection
NewsJul.08,2025
-
Top Stone Coated Metal Roofing Suppliers & Manufacturers Durable Stone Coated Metal Tile Solutions
NewsJul.07,2025
-
How Many Bundles of Asphalt Shingles in a Square? Fast Roofing Guide & Tips
NewsJul.07,2025
-
How Long Should a Cedar Shake Roof Last? Expert Guide & Replacement Options
NewsJul.06,2025


