Nov . 14, 2024 03:29 Back to list
laying asphalt shingles
Laying Asphalt Shingles A Comprehensive Guide
Asphalt shingles are one of the most popular roofing materials in North America due to their durability, affordability, and ease of installation
. If you’re considering a roofing project or undertaking a DIY task, understanding the process of laying asphalt shingles can empower you to achieve a professional-looking finish on your home.Before you begin, gather the necessary tools and materials. You will need asphalt shingles, roofing nails, a hammer, a utility knife, a chalk line, a ladder, and safety equipment such as gloves and goggles. Ensure you have enough shingles to cover your entire roof, including some extra for repairs or future maintenance.
Preparation The first step in laying asphalt shingles is to prepare the roof surface. Remove old shingles, nails, and debris from the roof deck. Check for any damage or rot in the plywood beneath and replace any compromised sections. Once you have a clean and solid surface, install a felt underlayment, which acts as a moisture barrier that protects your roof from potential leaks. Lay the underlayment horizontally, overlapping each row by at least six inches.
Marking Guidelines To lay the shingles in straight rows, use a chalk line to mark horizontal guidelines across the roof. Start at the eave and work your way up, allowing for a slight overhang at the edges of the roof. This will help water to flow off the roof effectively and provide a neat appearance.
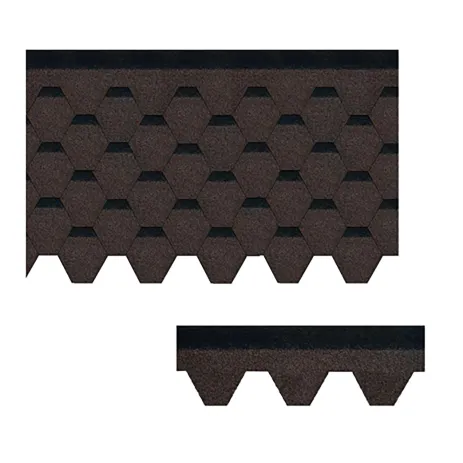
Laying the Shingles Begin laying the shingles from the bottom of the roof, working upwards. Start with the first row, ensuring that each shingle overlaps the one below by about half its length. Secure each shingle in place with roofing nails – typically four per shingle, although this can vary based on local building codes and wind conditions. Be cautious not to hammer too hard, as you could damage the shingles.
laying asphalt shingles

As you continue to lay shingles, stagger the seams between rows. This means that the end of each shingle in one row should not align with the ends of shingles in the rows above or below it. This staggering helps to prevent leaks and increases the roof's overall strength.
Ridge and Valleys Once you reach the peak of the roof, it's time to address the ridge cap shingles. These special shingles are designed to cover the peak and provide a finished look. Use the same type of shingles for consistency, cutting them as needed to fit.
In addition to the ridge, pay attention to any valleys where two slopes meet. Use metal flashing in these areas to direct water away from the seams and prevent leaks. Install shingles on either side of the valley, ensuring they leave about a two-inch gap where the metal flashing will be laid.
Finishing Touches After laying all shingles, inspect your work carefully for any missed nails or improperly placed shingles. It's essential to ensure that everything is secure before concluding your project.
In conclusion, laying asphalt shingles can be a manageable project for homeowners and DIY enthusiasts alike. With the right preparation, tools, and techniques, you can create a roofing system that not only enhances your home’s aesthetic appeal but also provides long-lasting protection against the elements. Always remember to follow safety precautions and local building codes for the best results.
-
Rubber Roofing Shingles - Durable & Weatherproof SBS Rubber Asphalt Shingles for Homes & Businesses
NewsJul.08,2025
-
Crest Double Roman Roof Tiles – Durable, Stylish Roofing Solution at Competitive Prices
NewsJul.08,2025
-
T Lock Asphalt Shingles Durable Roofing Solution for Long-lasting Protection
NewsJul.08,2025
-
Top Stone Coated Metal Roofing Suppliers & Manufacturers Durable Stone Coated Metal Tile Solutions
NewsJul.07,2025
-
How Many Bundles of Asphalt Shingles in a Square? Fast Roofing Guide & Tips
NewsJul.07,2025
-
How Long Should a Cedar Shake Roof Last? Expert Guide & Replacement Options
NewsJul.06,2025


