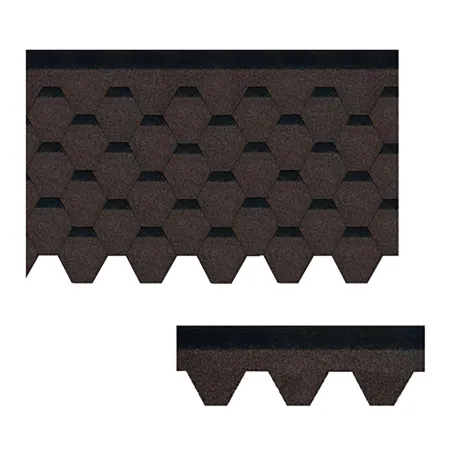
Dec . 05, 2024 23:28 Back to list
How to Effectively Replace Your Roof Shingles for Optimal Home Protection
Changing Roof Shingles A Comprehensive Guide
When it comes to home maintenance, one of the most crucial tasks is ensuring that your roof is in good condition. Roof shingles protect your home from the elements, and over time, they can wear out, leading to leaks, structural damage, and other costly issues. If you've noticed missing shingles, curling edges, or signs of water damage in your attic, it might be time to change your roof shingles. This article will guide you through the process of replacing roof shingles, helping you understand when to do it, how to do it, and what materials you need.
When to Change Roof Shingles
Not all types of shingles wear out at the same rate. Asphalt shingles, which are the most common, typically last 15 to 30 years, depending on the quality and local climate. It's important to inspect your roof regularly, especially after severe weather events like storms or hail. Signs that indicate it's time to change your shingles include
1. Curling or Buckling This occurs when the shingles start to lose their shape, often due to age or exposure to harsh weather. 2. Missing Shingles If you notice several shingles missing, it's a clear sign that your roof needs attention. 3. Granule Loss If you see granules in your gutters or in the area around your home, it means your shingles are deteriorating. 4. Leaks Water stains on ceilings or walls indicate that your roof is compromised and should be replaced.
How to Change Roof Shingles
Changing shingles can be a labor-intensive task, but with the right tools and materials, it can be accomplished by a determined homeowner or a professional. Here's a step-by-step guide to changing roof shingles
Tools and Materials Needed
- New asphalt shingles - Roofing nails - A hammer or nail gun - Roofing cement - A utility knife - A pry bar - Safety gear (gloves, goggles, and a harness if working at height)
Step 1 Preparation
Safety is paramount. Ensure you have the right equipment and a stable ladder to access your roof. Before starting, clear the area of any debris and ensure the weather conditions are safe for roofing work.
change roof shingles

Step 2 Remove Old Shingles
Start by using a pry bar to carefully lift and remove the old shingles. Work from the bottom up, being cautious not to damage underlying materials. Once you've removed the damaged shingles, check for any underlying damage to the roof deck.
Step 3 Inspect and Repair
After removing the shingles, inspect the roof deck for rot or damage. Replace any damaged sections with new plywood, securing it in place with roofing nails.
Step 4 Install New Shingles
Begin laying down the new shingles, starting from the bottom of the roof. Overlap each row, ensuring that the nail placement is appropriate, usually just above the adhesive strip that seals the shingles. Follow the manufacturer's instructions for the best results.
Step 5 Seal Edges and Finish Up
Use roofing cement to seal the edges of the new shingles and ensure a waterproof finish. After installation, clean up the work area, removing any debris from the site.
Conclusion
Changing roof shingles is an essential aspect of home maintenance that should not be overlooked. By staying vigilant and addressing issues promptly, you can protect your home from further damage and ensure its longevity. While this task can be undertaken by an experienced DIY enthusiast, hiring a professional roofer can guarantee quality workmanship and safety, especially if you are uncomfortable working at heights. Whichever route you choose, taking care of your roof is a wise investment in the overall health of your home.
-
Stone Coated Roman Tile Metal Roofing - Durable & Elegant
NewsJul.22,2025
-
Premium Roofing Granules for Sale - High Durability & Cost-Saving
NewsJul.21,2025
-
Durable Laminated Shingles for Weather-Resistant Roofing
NewsJul.21,2025
-
Rubber Roofing Shingles - Durable & Weatherproof SBS Rubber Asphalt Shingles for Homes & Businesses
NewsJul.08,2025
-
Crest Double Roman Roof Tiles – Durable, Stylish Roofing Solution at Competitive Prices
NewsJul.08,2025
-
T Lock Asphalt Shingles Durable Roofing Solution for Long-lasting Protection
NewsJul.08,2025


