
coolroof@cnchida.com
+86 13803333363
 Afrikaans
 Albanian
 Amharic
 Arabic
 Armenian
 Azerbaijani
 Basque
 Belarusian
 Bengali
 Bosnian
 Bulgarian
 Catalan
 Cebuano
 Corsican
 Croatian
 Czech
Czech
 Danish
 Dutch
Dutch
 English
 Esperanto
 Estonian
 Finnish
 French
 Frisian
 Galician
 Georgian
 German
 Greek
Greek
 Gujarati
 Haitian Creole
 hausa
hausa
 hawaiian
 Hebrew
 Hindi
Hindi
 Miao
Miao
 Hungarian
 Icelandic
 igbo
igbo
 Indonesian
 irish
irish
 Italian
 Japanese
 Javanese
 Kannada
 kazakh
 Khmer
Khmer
 Rwandese
 Korean
 Kurdish
 Kyrgyz
 Lao
Lao
 Latin
Latin
 Latvian
 Lithuanian
 Luxembourgish
 Macedonian
 Malgashi
 Malay
Malay
 Malayalam
 Maltese
 Maori
Maori
 Marathi
 Mongolian
 Myanmar
 Nepali
 Norwegian
 Norwegian
 Occitan
 Pashto
 Persian
 Polish
 Portuguese
 Punjabi
 Romanian
 Russian
 Samoan
 Scottish Gaelic
 Serbian
 Sesotho
 Shona
Shona
 Sindhi
 Sinhala
 Slovak
 Slovenian
 Somali
 Spanish
 Sundanese
 Swahili
 Swedish
 Tagalog
 Tajik
Tajik
 Tamil
Tamil
 Tatar
Tatar
 Telugu
 Thai
Thai
 Turkish
 Turkmen
 Ukrainian
 Urdu
Urdu
 Uighur
 Uzbek
Uzbek
 Vietnamese
 Welsh
Welsh
 Bantu
Bantu
 Yiddish
 Yoruba
 Zulu
Zulu
डिस . 17, 2024 09:10 Back to list
How to Properly Install Tin Roofing Over Existing Shingle Roofs for Maximum Protection
Installing Tin Over Shingles A Step-by-Step Guide
When it comes to roofing solutions, homeowners often explore various options to enhance their roof’s durability and aesthetic appeal. One increasingly popular choice is installing tin (also known as metal) roofing over existing shingles. This method not only saves time and labor but also provides an additional layer of protection against the elements. In this article, we will guide you through the process of installing tin over shingles, ensuring that you achieve a long-lasting and visually appealing result.
Why Choose Tin Roofing?
Before diving into the installation process, it’s important to understand the benefits of tin roofing. Metal roofs are known for their longevity, typically lasting 40 to 70 years, depending on the material used. They are resistant to extreme weather conditions, fire, and pests. Additionally, metal roofs reflect solar heat, which can help reduce energy costs. When installed over shingles, they also minimize landfill waste, as you won’t need to remove the old roof.
Preparation Steps
Before beginning the installation, you’ll need to gather the necessary materials and tools. You will require
- Tin roofing panels - Underlayment (if desired) - Screws with rubber washers - A utility knife - Measuring tape - A ladder - A drill - Safety goggles and gloves
Once you have everything prepared, follow these steps for a successful installation
Before you proceed with the installation, inspect the existing shingles for any damage. Look for missing or loose shingles, leaks, or rot. If significant damage is found, it may be wise to repair or replace those areas before installing the tin roof.
2. Clean the Roof Surface
Ensure that the existing shingles are clean and free of debris. Remove any leaves, dirt, or moss that could interfere with the new roofing. A clean surface ensures better adhesion and longevity of the tin roofing.
3. Install Underlayment
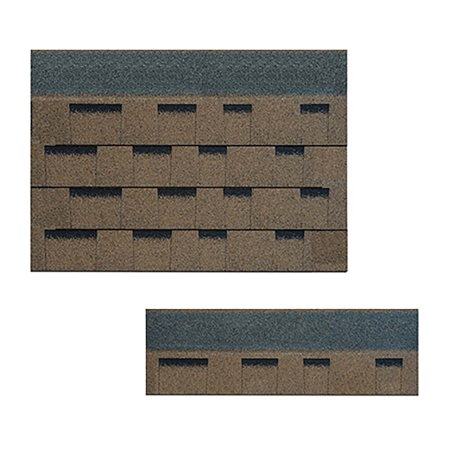
installing tin over shingles
Although it’s optional, laying down an underlayment can provide additional moisture protection and help with insulation. This could be a synthetic felt or a specialized underlayment specifically designed for metal roofing. Ensure it overlaps the edges significantly to prevent water penetration.
4. Measure and Cut the Tin Panels
Begin measuring your roof to determine how many tin panels you’ll need. Tin roofing panels typically come in standard sizes, so measure your roof length and width accordingly. Using a utility knife or metal snips, carefully cut the panels to fit your dimensions.
5. Begin Installation at the Base
Start at the bottom edge of the roof and work your way up. Place the first panel in position, ensuring it aligns properly with the edges of the roof. Secure the panel with screws, placing them in the uppermost part of the panel rib to allow for expansion.
6. Overlap the Panels
As you continue to install panels, make sure each one overlaps the previous panel by at least one inch. This overlap is crucial for preventing water intrusion. Use the screws to secure these overlapping sections, being mindful not to over-tighten, as this could damage the panels.
7. Address Roof Features
When you encounter roof features such as vents or chimneys, you’ll need to cut the panels to accommodate these structures. Ensure that there are flashing details around these areas to direct water away from potential leaks.
8. Finish with Trim and Accessories
Once the panels are installed, finish the job with appropriate trim pieces along the edges and ridges of the roof. This not only enhances the aesthetic appeal but also provides extra protection against wind and water.
Conclusion
Installing tin over shingles can be a rewarding DIY project that enhances your home’s roof without the hassle of complete tear-off. By following these steps and ensuring a careful and methodical approach, you will not only improve your home’s value but also enjoy the benefits of a long-lasting and weather-resistant roof. Always remember to prioritize safety, employing proper equipment and taking precautions during the installation process. With patience and precision, your tin roof will provide years of protection and style.
Previous:
Next:
Latest news
-
How Long Do Composite Shingles Last? 30-50 Year Lifespan & Durability
NewsMay.21,2025
-
Roofing Shingles Cost Price, Weight & Granule Loss Guide
NewsMay.20,2025
-
Steel Tile Roofing Durable & Affordable Tile-Like Metal Roofing
NewsMay.20,2025
-
Installing Steel Roof Over Shingles Durable, Cost-Effective Solution
NewsMay.20,2025
-
Energy-Efficient Rooftop Cooling Sheets & Ceramic Tiles for Heat Reduction
NewsMay.19,2025
-
Average Cost to Replace Asphalt Shingles Per Sq Ft & Roof Estimates
NewsMay.19,2025


Copyright © 2025 Hebei Chida Manufacture and Trade Co., Ltd. All Rights Reserved. Sitemap | Privacy Policy