नोव्हेंबर . 22, 2024 05:11 Back to list
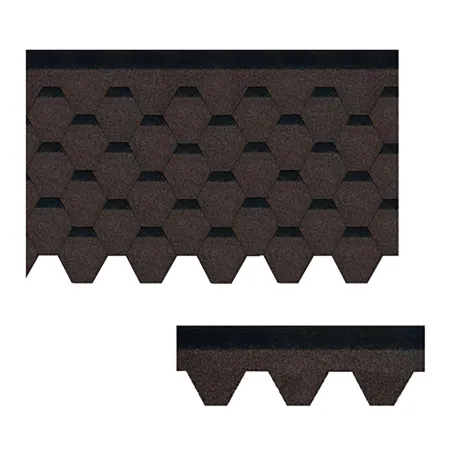
installing architectural roof shingles
Installing Architectural Roof Shingles A Step-by-Step Guide
When it comes to enhancing the aesthetics and durability of your home, installing architectural roof shingles is one of the best choices you can make. Architectural shingles, known for their dimensional appearance and superior durability over traditional 3-tab shingles, offer both functional and visual benefits. This guide will walk you through the process of installing these shingles efficiently and effectively.
Materials Needed
Before commencing the installation process, gather all necessary materials and tools, which include
- Architectural roof shingles - Underlayment (e.g., felt paper or synthetic underlayment) - Roofing nails (specific to asphalt shingles) - Roof flashing - Chalk line - Utility knife or shingle cutter - Measuring tape - Hammer or roofing nail gun - Ladder or scaffolding - Safety gear (gloves, goggles, etc.)
Preparation
1. Check Local Codes Before starting, check your local building codes and regulations to ensure compliance. Some areas may have specific requirements for roofing materials or installation methods.
2. Inspect the Roof Before installing new shingles, check the existing roof for damage. Remove any old roofing materials and replace any rotten or damaged wood decking. A solid, clean surface is essential for a successful installation.
3. Install Underlayment Lay down your chosen underlayment over the entire surface of the roof. This material acts as a moisture barrier, protecting the wood deck from potential leaks. Overlap the edges of the underlayment, ensuring it is secured with roofing nails or adhesive as recommended.
Installing Architectural Shingles
installing architectural roof shingles

4. Starting Row Begin at the bottom edge of the roof and work your way up. Lay the first shingle at the eave, ensuring it overhangs slightly (usually about 1/4-inch) to create a drip edge. This helps water run off without seeping underneath the shingles.
5. Nailing Use roofing nails to secure each shingle; typically, four to six nails should suffice depending on the manufacturer's instructions. Make sure to nail through the shingle and into the decking, but avoid over-nailing, which can lead to leaks.
6. Staggering Joints As you install the shingles, stagger the joints between rows. This is crucial for creating a layered appearance that enhances visual appeal and ensures better water resistance. Follow the manufacturer's recommendations for the proper offset.
7. Trim at Ridge Once you reach the ridge of the roof, cut shingles to fit snugly against the ridge cap. The cap shingles are typically designed to overlap these cut edges, providing both durability and style. Fasten these ridge shingles in place, ensuring a secure fit.
8. Flashing Installation Install flashing around any chimneys, vents, or protrusions to prevent water from seeping through gaps. Properly installed flashing is vital in preventing leaks and extending the life of your roof.
9. Final Checks After the shingles are in place, inspect the entire roof for any loose nails, misaligned shingles, or exposed areas. Address any issues immediately to ensure the integrity of the installation.
Maintenance Tips
Once your architectural shingles are installed, maintaining them is key to longevity. Regular inspections, especially after severe weather, can help catch any potential problems early. Keep gutters clean, remove debris from the roof, and trim overhanging branches to prevent damage.
Conclusion
Installing architectural roof shingles is a project that can significantly enhance your home's curb appeal and overall value. With proper preparation, attention to detail, and adherence to safety standards, you can achieve a durable and aesthetically pleasing roof that will last for years to come. Whether you are a seasoned DIY enthusiast or a novice homeowner, this guide aims to offer clarity and confidence in undertaking your roofing project. Always remember, when in doubt, consulting with a professional can save time and ensure a quality installation. Happy roofing!
-
Small Clay Roof Tiles for Durable & Stylish Roofing Red & Custom Options Available
NewsJun.24,2025
-
Lifetime Roof Shingles – Durable Roofing Solutions for Decades
NewsJun.10,2025
-
Top Roofing Shingles Types Compare Different Types of Architectural Roofing Shingles for Your Home
NewsJun.10,2025
-
Affordable Asphalt Shingle Roll Durable & Easy Flat Roof Solution
NewsJun.09,2025
-
Metal Asphalt Look Roofing Durable Shingle-Style Options
NewsJun.09,2025
-
Premium Clay Valley Roof Tiles Durable & Eco-Friendly
NewsJun.09,2025


