dec . 24, 2024 21:15 Back to list
metal tile roof installation
Metal Tile Roof Installation A Comprehensive Guide
When it comes to roofing options, metal tile roofs have gained significant popularity due to their durability, aesthetic appeal, and energy efficiency. Installing a metal tile roof may seem daunting, but with proper planning and execution, the process can be straightforward. This article will guide you through the steps of metal tile roof installation to ensure you achieve a successful outcome.
Understanding Metal Tile Roofs
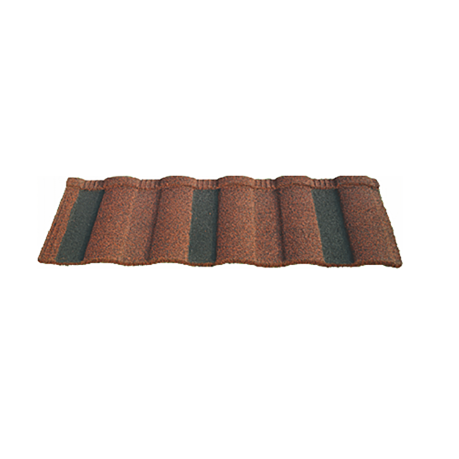
Metal tile roofs mimic the look of traditional clay or concrete tiles but are constructed from light-weight, durable metal materials. They offer advantages such as resistance to harsh weather conditions, longevity (with lifespans often exceeding 50 years), and low maintenance requirements. Additionally, they reflect solar heat, which can help in reducing energy costs.
Preparation Before Installation
Before starting your project, it’s essential to prepare adequately. Here are the key steps
1. Choose the Right Materials Select high-quality metal tiles that suit your aesthetic preferences and climate. Options may include aluminum, steel, or copper tiles, each with unique benefits and costs.
2. Gather Necessary Tools and Equipment You will need essential tools such as a measuring tape, chalk line, utility knife, roofing nail gun or hammer, and safety gear (gloves, goggles, etc.).
3. Assess Your Roof Structure Inspect your existing roof for any signs of damage. It’s crucial to make repairs to your roof deck before installation to ensure a solid foundation for the metal tiles.
4. Check Local Building Codes Familiarize yourself with local regulations concerning roofing materials and installation practices to ensure compliance.
Step-by-Step Installation Process
Once you are prepared, follow the steps outlined below to install your metal tile roof
1. Install Underlayment Begin with installing a waterproof underlayment or roofing felt over the entire roof deck. This serves as an additional layer of protection against moisture.
metal tile roof installation

2. Mark Layout Guidelines Using a chalk line, mark horizontal lines on your roof to ensure the tiles are installed evenly. The lines should be placed according to the pattern or installation instructions of the metal tiles chosen.
3. Start with Eaves Begin installing your metal tiles from the eaves moving up towards the ridge. Place the first tile and ensure it overlaps the underlayment correctly. Secure it with roofing nails, taking care to follow the manufacturer's guidelines regarding nail spacing.
4. Continue Installing Tiles Continue placing tiles row by row. Make sure each tile overlaps the previous row adequately to prevent water penetration. Use a utility knife to cut tiles as needed for corners or edges.
5. Install Ridge Caps Once all the tiles are secured, install ridge caps along the peak of the roof. This provides a finished look and additional protection against wind and rain.
6. Inspect Your Work After installation, thoroughly inspect your roof for any missing tiles or exposed areas. Ensure that all tiles are secured and that there are no gaps that could lead to future issues.
Maintenance Tips for Metal Tile Roofs
Once your metal tile roof is installed, maintenance is minimal, but some tasks will enhance its longevity
- Regular Inspections Check your roof at least twice a year for any damage or wear and tear caused by weather conditions.
- Clean Debris Remove leaves, branches, and other debris that can trap moisture and lead to corrosion over time.
- Paint and Coatings Depending on the material, consider applying protective coatings or paint to enhance durability and aesthetic appeal.
Conclusion
Installing a metal tile roof not only enhances the beauty of your home but also provides immeasurable value through energy efficiency and durability. By following the outlined steps and paying close attention to detail during installation, you can ensure that your metal tile roof serves you well for decades to come. Remember, when in doubt, consulting with a professional roofing contractor can provide additional insights and expertise needed for a successful installation. Happy roofing!
-
New Roof Shingles Losing Granules? Durable Solutions & Prevention Tips
NewsMay.17,2025
-
Terracotta Roof Cost Durable & Affordable Tile Solutions
NewsMay.17,2025
-
Clay Tile & Asphalt Roof Repairs Expert Solutions & Fast Fixes
NewsMay.16,2025
-
How Long Do Clay & Cement Tile Roofs Last? + Durability Tips
NewsMay.16,2025
-
High-Reflective Asphalt Glass Shingles Durable & Energy-Efficient Roofing
NewsMay.15,2025
-
Laminated Shingles Price Durable & Affordable Roofing Solutions Explore Now
NewsMay.15,2025


